Step 2 - In emsCharts - configure three code tables
Note: The following video covers how to do step 2 and 3.
Notes:
- Software Administrator access is needed to configure this section in emsCharts.
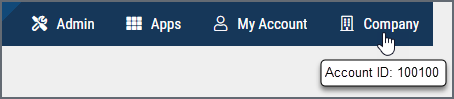
- You will need your ZOLL Online account number. To find it, log onto ZOLL Online and hover over the Company icon on the navigation bar.
This section steps you through configuring three emsCharts code tables:
Web EKG Server Setup
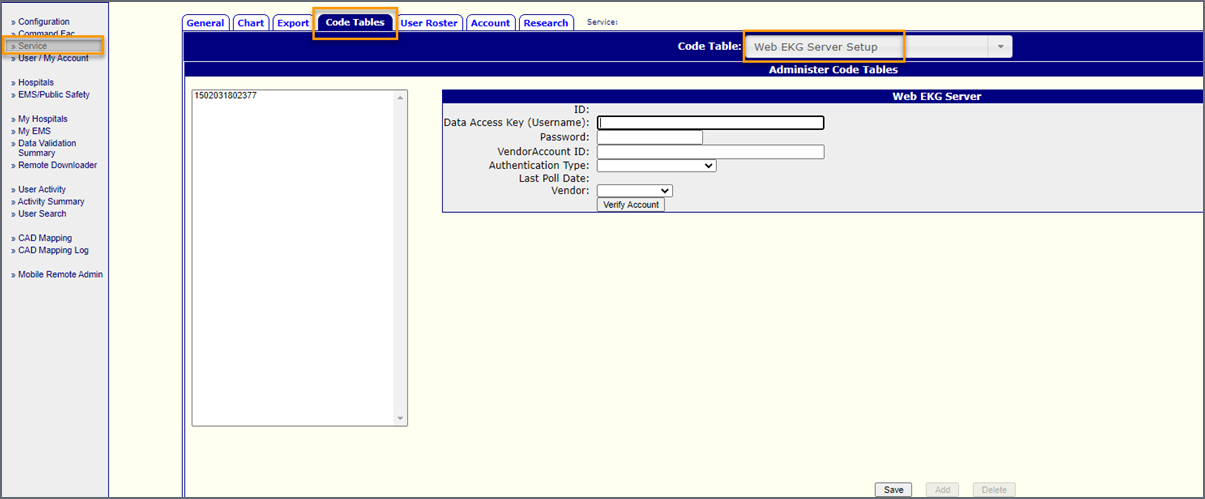
Use Web EKG Server Setup to enter the Data Access Key information from CaseReview that you recorded in step 1 (when you created the DAK in CaseReview).
- Data Access Key (Username): Enter the DAK's access key.
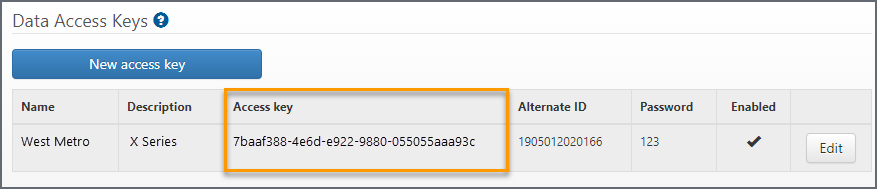
- Password: Enter the password you configured for this DAK in CaseReview.
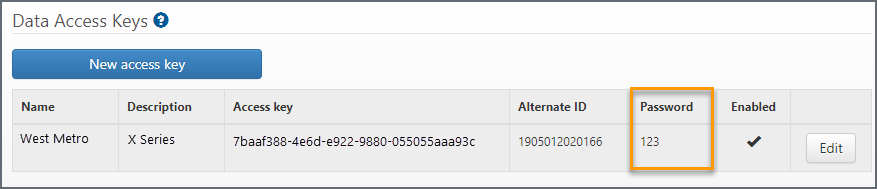
- Vendor Account ID: This is your ZOLL Online account number. You can find it by logging into ZOLL Online and hovering over the Company icon on the navigation bar.
- Authentication Type: Select Data Access Key.
- Last Poll Date: Displays the account’s last verify date.
- Vendor: Select ZOLL.
- Click Save.
Web EKG Configuration
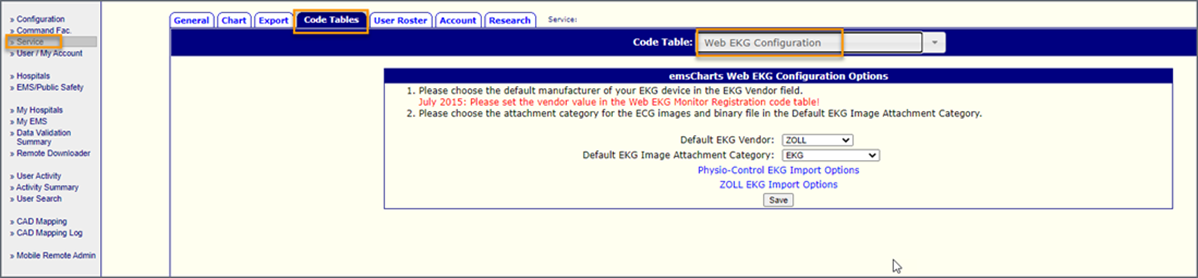
Use Web EKG Configuration to configure:
- Default EKG vendor: Select ZOLL.
- Default EKG Image Attachment Category: Select EKG.
- Click ZOLL EKG Import Options: On the ZOLL EKG Vitals/Events Options page select which events to import. Scroll down to the bottom and click Save.
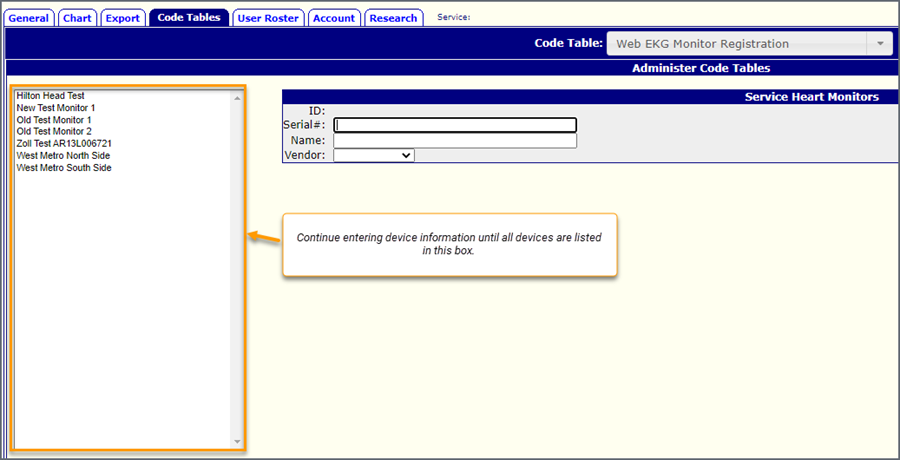
Web EKG Monitor Registration
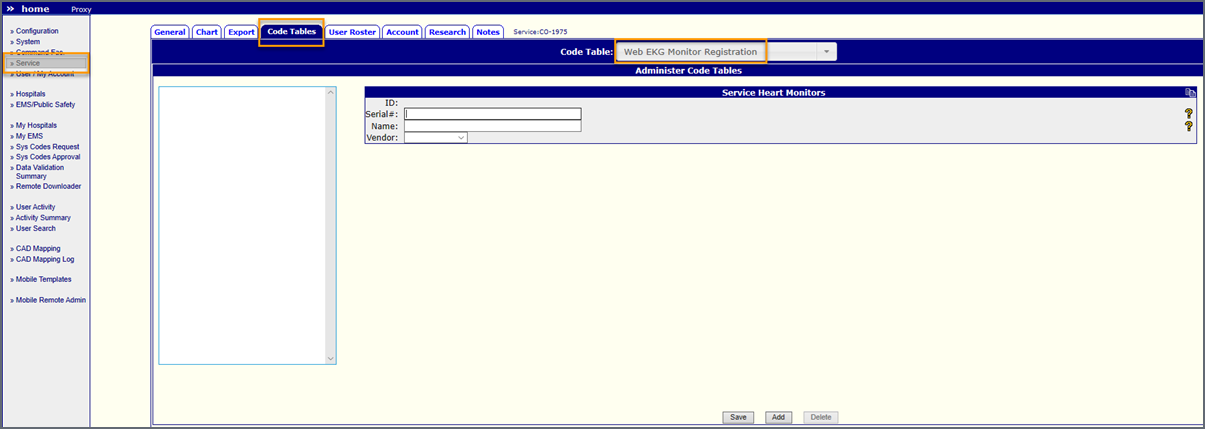
Use Web EKG Monitor Registration to configure all ZOLL monitors. All configured monitors display in the box so review the box's contents to see if it is already configured before you add a new device.
- ID: Enter the device’s ID number.
- Serial: Enter the device’s serial number.
- Name: Enter an identifying name for this device.
- Vendor: Select ZOLL.
- Click Save.
- Repeat these steps until all ZOLL monitors are configured and appear in the box on the left side of the page.